- Print
- DarkLight
Meeting Preference Settings
For the following settings, please navigate to "Settings" via the side menu of the Zelvor application.
Select "Meeting preferences" from the settings menu tab.
Working Hours
Information
The stored working hours form the time frame in which daily appointments can take place for you. Please enter your core working hours - time windows where you may not be available or prefer to have appointments can be set below.
Navigate to the "Working Hours" field. Use the drop-down menu to select the working days for which you want to store identical working hours (e.g. the same daily working hours should be created for Monday, Tuesday, Wednesday).
Select the working times for the selected working days via the two drop-down menus. These working times will then apply to all working days that have been selected before.
If you want to remove a selected working day, click on the "X" in the blue box of the respective day.
If you want to enter different working times for some working days, please click on the plus sign next to "Apply to". An additional input area for working times will now appear. Follow steps 1-3 again.
Confirm your entry by clicking the "Save Changes" button.
Work Time Flexibility (Overtime Flexibility)
Information
Overtime Flexibility is the time frame in which you are available for appointments before or after your regular working hours in exceptional circumstances. This flexibility window is used by Zelvor for the allocation of meetings only in exceptional situations (e.g. in case of urgent appointments, but an already filled appointment calendar during core working hours). You do not have to worry that entering a working time flexibility will regularly schedule appointments outside your working hours.
Navigate to the "Overtime Flexibility" field and enter your flexibility before your regular work hours start on the left and the flexibility after on the right. Use the drop down menu to select your preference. This flexibility preference will be applied to all work days.
Confirm your entry by clicking the "Save Changes" button.
Length of Meeting Blocks
Information
The length of meeting blocks allows you to specify the maximum length of time you would like to be continuously involved in meetings. Thus, a preferred meeting block length of 2 hours means that Zelvor will automatically arrange your meeting in two-hour blocks (i.e., four 30-minute meetings connected in a row, for example).
Navigate to the "Preferential meeting block length" field and select your preferred meeting block length via the drop-down menu.
Confirm your entry via the "Save Changes" button.
Pauses after Meeting Blocks
Information
Here you can set that after your preferred appointment block length a break is scheduled before the next appointment can be scheduled. For example, with a preferred appointment block length of 2 hours, a break would be added to the calendar after the appointment block.
Navigate to the "Preferential meeting break length" field and use the drop-down menu to select your preferred break length after the end of an appointment block.

Confirm your entry via "Save Changes" button.
Preferred Time Windows for Meetings
Information
Zelvor tries to schedule all your meetings into your preferred time slot as best as possible. The preferences of you and your team are aligned when scheduling meetings, so meetings will preferentially take place in these time slots.
Navigate to the Preferred meeting time windows field and use the drop-down menu to select the work days for which you want to store the identical appointment preferences. You can only select the days that you have previously deposited as working days.
Define your preferred appointment time slots by the cursor of the time bar. You can create several time windows per day (e.g. in the morning and in the afternoon).
If you want to remove a selected working day, click on the "X" in the blue box of the respective day.
If you want to enter different date preferences for working days, click on "Add an exception" and repeat steps 1-3.
Confirm your entry via "Save Changes"-button.
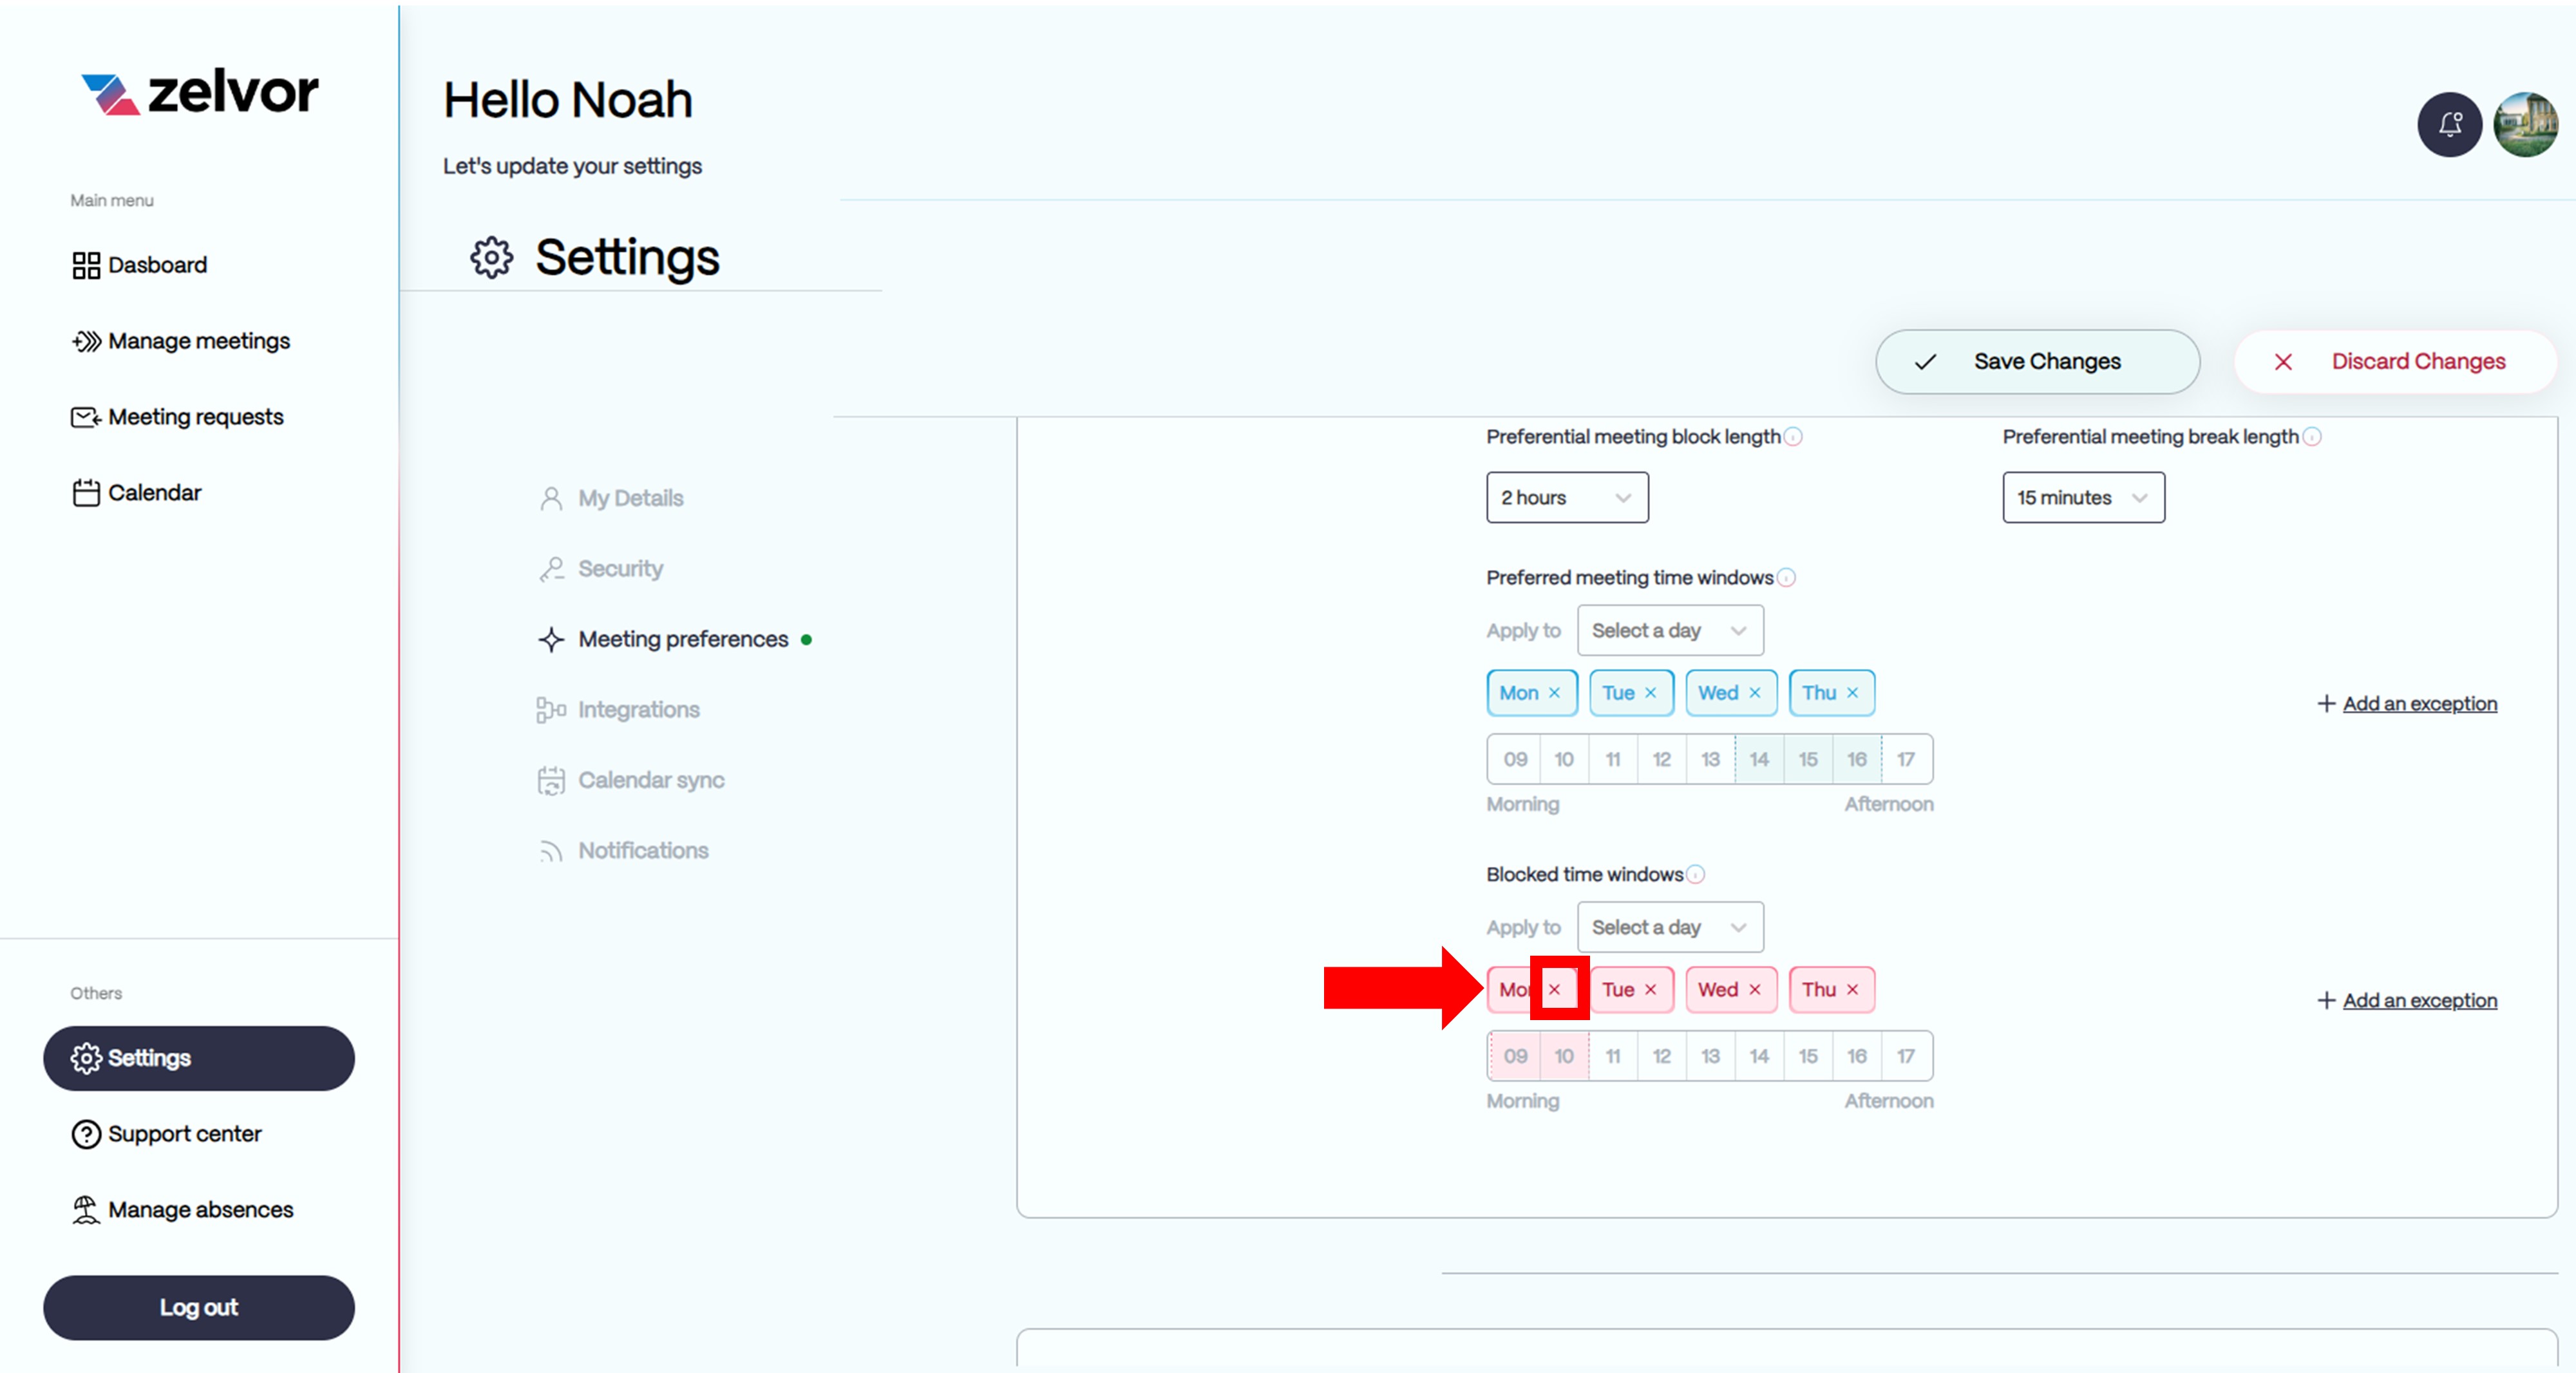
Blocked (meeting-free) Time Slots
Information
The blocked time slots are protected by Zelvor from any appointments, i.e. you can be sure that you will stay appointment-free during these time slots.
Navigate to the "Blocked time windows" field and use the drop-down menu to select the working days for which you want to store the identical blocked time windows. You can only select the days that you have previously deposited as working days.
Define your blocked time windows by the cursor of the timeline. You can create several time windows per day (e.g. morning and afternoon).
If you want to remove a selected working day, click on the "X" in the red box of the respective day.

If you want to enter deviating blocked time windows for working days, click on "Add an exception" and repeat steps 1-3.


.JPG)


